
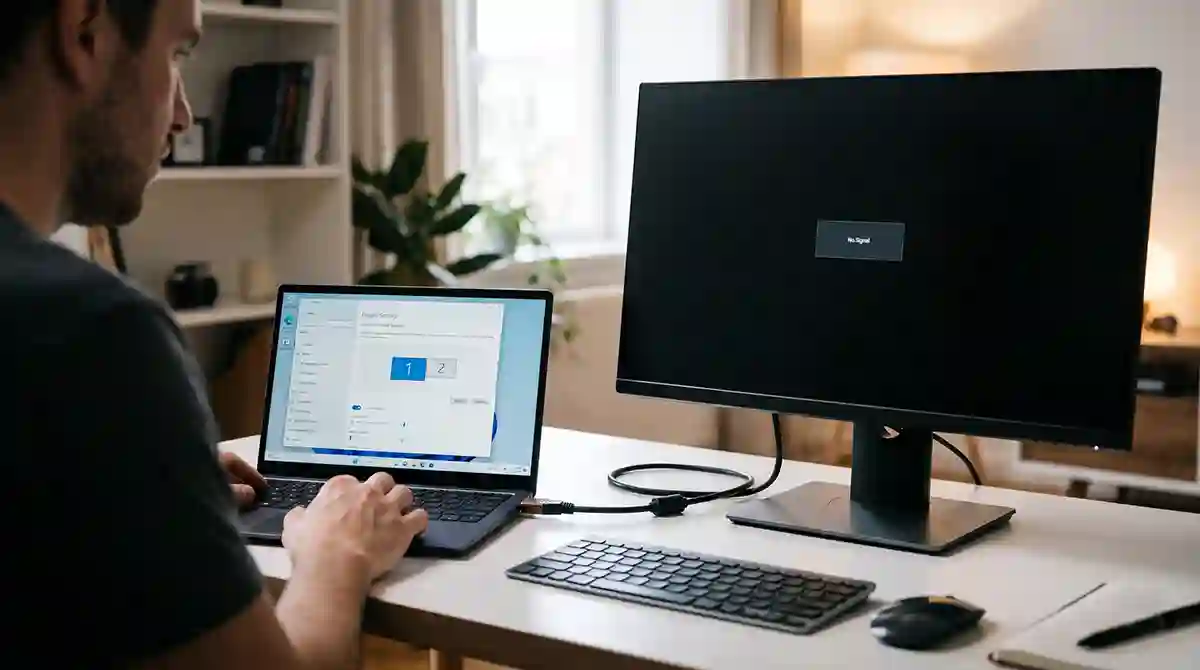
You connect your laptop to an external monitor, switch everything on, and wait for the second screen to appear. But nothing happens. The monitor displays “No Signal”, stays black, or shows the same desktop even though you expected an extended display.
This can be frustrating, especially when you need a larger screen for office work, online classes, presentations, or editing documents.
The problem does not necessarily mean that your laptop or monitor is damaged. Sometimes, the issue is caused by a loose HDMI cable, an incorrect input setting, an unsupported USB-C port, or a Windows display configuration.
Fortunately, you can troubleshoot most external monitor connection problems yourself.
In this guide, you will learn how to fix a laptop that will not connect to an external monitor in Windows 10 and Windows 11. Start with the basic checks and move to the advanced solutions if the problem continues.
1. Check the Monitor’s Power and Connection
Before changing Windows settings, make sure the monitor is properly connected and switched on.
It may sound obvious, but a loose cable or incorrect power connection is one of the easiest problems to overlook.
Follow these steps:
- Make sure the monitor’s power cable is firmly connected.
- Switch on the monitor using its power button.
- Check whether its power indicator light is on.
- Disconnect the video cable from both devices.
- Reconnect it firmly to the laptop and monitor.
- Wait a few seconds to see whether the display appears.
If the monitor displays a message such as “No Signal”, it means that it is not receiving a usable video signal through the selected input.
Check the monitor’s physical buttons or menu to confirm that it is using the correct input source.
For example, if your HDMI cable is connected to HDMI 1, the monitor should not be set to DisplayPort or HDMI 2.
Also, if you are using a desktop monitor with multiple input ports, try another available port if your equipment supports it.
2. Make Sure You Are Using the Correct Cable
Different laptops and monitors support different display connections. Using an incompatible cable or adapter can prevent the second screen from working.
The most common connection types include:
- HDMI: Commonly used for connecting laptops, televisions, and monitors.
- DisplayPort: Found on many computer monitors and some laptops or docking stations.
- USB-C: Can carry video, but only when the laptop’s USB-C port supports the required display functionality.
- Thunderbolt: Supports display connections through compatible ports, cables, and adapters.
- VGA: An older video connection that may still be available on some equipment.
Do not assume that every USB-C port supports an external display. Some USB-C ports are designed only for data transfer or charging.
Check your laptop manufacturer’s specifications to confirm whether the port supports DisplayPort Alt Mode or Thunderbolt video output.
If you are using an adapter, make sure it supports the connection you need. For example, a USB-C-to-HDMI adapter must be compatible with your laptop’s video output.
A cable that works for charging or file transfers does not necessarily support video.
Read more: How to Make Your Wi-Fi Faster Without Buying a New Router
3. Select the Correct Input Source on Your Monitor
Many monitors have multiple input options. If the wrong input is selected, the screen may remain black even when the cable is connected correctly.
For example, your monitor may support HDMI, DisplayPort, and USB-C, but Windows is sending the video signal through HDMI.
To fix this:
- Turn on your monitor.
- Press its Menu or Input button.
- Open the input source settings.
- Select the port connected to your laptop.
- Wait a few seconds for the display to appear.
If you are unsure which port you are using, check the cable connection at the back of the monitor.
Some monitors also have an automatic input selection feature. You can try enabling it if available.
If the monitor still displays “No Signal”, continue with the next step.
4. Use Windows Display Settings to Detect the Monitor
Sometimes, Windows does not automatically detect an external display. You can manually ask the system to search for connected monitors.
In Windows 11:
- Right-click an empty area of your desktop.
- Select Display settings.
- Scroll down to the Multiple displays section.
- Expand the available options if necessary.
- Click Detect.
- Wait for Windows to search for another display.
In Windows 10:
- Right-click the desktop.
- Select Display settings.
- Scroll down to Multiple displays.
- Click Detect.
If Windows finds the monitor, it should appear in the display arrangement.
You can then select how you want to use it.
If Windows does not detect the monitor, check the cable, adapter, input source, and laptop port before moving to more advanced troubleshooting.
5. Press Windows + P to Choose the Display Mode
Windows includes a shortcut that lets you choose how your laptop uses an external monitor.
If the second screen is connected but not displaying the expected content, you may have selected the wrong display mode.
Press Windows + P on your keyboard.
A menu will appear with four options:
PC screen only: Displays everything on the laptop’s built-in screen. The external monitor is not used as the main display.
Duplicate: Shows the same content on both screens. This is useful when giving a presentation or showing something to another person.
Extend: Turns the external monitor into an additional desktop. You can move windows between the laptop screen and the monitor.
Second screen only: Displays content on the external monitor and turns off the laptop’s built-in display.
Choose Extend if you want to use both screens independently.
Choose Duplicate if you want the same picture on both displays.
If you accidentally selected PC screen only, the external monitor may appear blank even though it is connected correctly.
Also read: How to Rank #1 on YouTube Using Free AI Tools
6. Restart Your Laptop and Monitor
Temporary software or connection problems can sometimes prevent Windows from recognising an external display.
Restarting both devices may resolve the issue.
Follow these steps:
- Save your work and close open applications.
- Disconnect the monitor cable from your laptop.
- Turn off the monitor.
- Restart your laptop.
- Wait until Windows has fully loaded.
- Turn on the monitor.
- Reconnect the video cable.
- Check whether the external display works.
If you are using a docking station or USB-C hub, disconnect and reconnect it as well.
For a powered docking station, follow its manufacturer’s instructions before disconnecting its power supply.
This method can help clear temporary connection problems without changing important Windows settings.
7. Update Your Graphics Driver
Your laptop uses a graphics driver to communicate with its display hardware. If the driver is outdated, damaged, or incompatible, Windows may have difficulty detecting or displaying an external monitor.
This problem can appear after a Windows update, graphics driver update, or operating system installation.
To check for available driver updates:
- Right-click the Start button.
- Select Device Manager.
- Expand Display adapters.
- Identify your graphics device.
- Right-click it.
- Select Update driver.
- Choose the option to search automatically for drivers.
Windows may find an available driver, but it does not always provide the latest version.
You can also visit your laptop manufacturer’s official support website and search for your exact model.
Some laptops use graphics hardware from Intel, NVIDIA, or AMD. If you download a driver directly from a graphics manufacturer, make sure it is compatible with your laptop and its hardware configuration.
Avoid downloading drivers from unfamiliar websites.
After installing a driver, restart your laptop and test the external monitor again.
8. Roll Back the Graphics Driver if the Problem Started After an Update
Updating a driver can sometimes introduce a new problem instead of fixing an existing one.
For example, your external monitor may have worked perfectly before a graphics driver update but stopped connecting afterward.
In that situation, rolling back the driver may help.
Follow these steps:
- Open Device Manager.
- Expand Display adapters.
- Right-click your graphics device.
- Select Properties.
- Open the Driver tab.
- Look for Roll Back Driver.
- If the option is available, follow the instructions.
The rollback option may be unavailable if Windows does not have an earlier driver stored.
After rolling back, restart your laptop and check the monitor connection.
Do not remove graphics drivers randomly. If you are unsure which driver controls your laptop’s display, check the manufacturer’s support instructions first.
9. Check Your Screen Resolution and Refresh Rate
An external monitor may fail to display correctly if Windows is using a resolution or refresh rate that the monitor does not support.
This can happen when connecting a laptop to an older monitor or using a high-resolution display through an adapter that has limited capabilities.
To check the display resolution in Windows 11:
- Open Settings.
- Select System.
- Click Display.
- Select the external monitor if it appears.
- Find the Display resolution setting.
- Choose the recommended resolution.
You can also check the refresh rate:
- Open Settings > System > Display.
- Select Advanced display.
- Choose the external monitor.
- Check the available refresh rates.
- Select a supported option.
In Windows 10, open Display settings and look for the Advanced display settings option.
If the external monitor is not detected at all, you may not be able to change its resolution or refresh rate yet. In that case, focus on the physical connection and driver troubleshooting first.
For the best results, use the resolution and refresh rate recommended by the monitor manufacturer.
10. Test Another HDMI Cable or Port
A damaged cable can prevent a laptop from sending a video signal to an external monitor.
Even if a cable looks normal from the outside, its internal wiring or connector may be damaged.
If possible, try another cable that you know works.
You can also test different ports:
- Connect the cable to another HDMI port on the monitor.
- Try another video output on the laptop, if available.
- Test the monitor with another computer.
- Connect your laptop to a different monitor or television.
These tests help identify which device is causing the problem.
For example, if the monitor works with another laptop using the same cable, the issue may be related to your original laptop.
If another monitor works with your laptop, the original monitor or its input settings may be responsible.
Testing one component at a time is better than buying several replacement cables without knowing the actual problem.
11. Check Whether Your USB-C Port Supports Video Output
Many modern laptops use USB-C ports instead of traditional HDMI ports. You may need a USB-C-to-HDMI adapter or a USB-C docking station to connect an external display.
However, not every USB-C port supports video output.
Some USB-C ports support only charging and data transfer. Others support DisplayPort Alt Mode or Thunderbolt, which can carry video signals.
Before purchasing an adapter, check your laptop’s technical specifications.
Look for terms such as:
- DisplayPort Alt Mode
- Thunderbolt 3 or Thunderbolt 4
- USB4 with display support
- USB-C video output
The exact capabilities depend on the laptop model and port configuration.
If your laptop supports video over USB-C but the monitor still does not work, try another compatible cable or adapter.
Also check whether the adapter requires external power or has any compatibility limitations.
12. Disconnect and Reconnect Your Docking Station
If you connect your monitor through a docking station or USB-C hub, the problem may be related to that device rather than your laptop or monitor.
A docking station can connect several devices through one cable, including external displays, keyboards, mice, and storage devices.
If its display connection stops working, try the following:
- Disconnect the docking station from your laptop.
- Disconnect the monitor cable from the docking station.
- Check whether the docking station has a separate power supply.
- Reconnect the required power cable.
- Connect the monitor cable again.
- Reconnect the docking station to your laptop.
- Wait for Windows to detect the display.
If the docking station has a firmware update available, check the manufacturer’s official support page.
Some docking stations also have display limitations. For example, they may support only a particular resolution or number of monitors.
Check the manufacturer’s specifications if you are trying to connect two or more external displays.
13. Check Windows Update
An incomplete or outdated Windows installation can sometimes cause display compatibility problems.
Windows updates may include improvements or fixes for hardware and graphics-related issues.
To check for updates in Windows 11:
- Open Settings.
- Select Windows Update.
- Click Check for updates.
- Install available updates.
- Restart your laptop if required.
You can also check optional updates for relevant drivers.
In Windows 10, open Settings and select Update & Security > Windows Update.
If the external monitor stopped working immediately after a particular update, investigate whether the update introduced a driver or compatibility issue before uninstalling anything.
Do not repeatedly install and remove updates without identifying the likely cause.
14. Test the Monitor With Another Device
If you have tried different cables and display settings, test the monitor with another device.
For example, connect it to:
- Another laptop
- A desktop computer
- A compatible gaming console
- Another device with a supported video output
If the monitor works correctly with another device, the problem may be related to your laptop, its display port, graphics driver, or Windows configuration.
If the monitor does not work with any device, check its power supply, input settings, cables, and hardware condition.
You can also test your laptop with another external monitor or television.
These simple tests help separate a laptop problem from a monitor problem.
If your laptop is also running slowly or experiencing other software problems, our guide on How to Make Your Laptop Faster Without Upgrading It explains several practical ways to improve its performance.
15. When to Consider a Hardware Problem
If none of the previous solutions work, the issue may involve damaged hardware.
Possible causes include:
- A damaged HDMI or USB-C port.
- A faulty internal display output connection.
- A defective monitor input.
- A damaged docking station.
- A faulty graphics component.
Look for physical signs of damage, such as a loose port, bent connector, or cable that disconnects when moved.
Do not force a cable into a port or attempt to repair internal laptop components yourself if you are not experienced with hardware repairs.
If your laptop is still under warranty, contact the manufacturer or an authorised service centre before opening the device.
Common Mistakes to Avoid When Connecting an External Monitor
A few common mistakes can make a simple display problem harder to solve.
- Assuming every USB-C port supports video: Check your laptop’s specifications before purchasing an adapter.
- Ignoring the monitor’s input source: Make sure the monitor is set to HDMI, DisplayPort, or USB-C according to the cable you are using.
- Selecting the wrong Windows display mode: Use Windows + P to choose Duplicate, Extend, or another suitable option.
- Downloading drivers from unknown websites: Use Windows Update or the official laptop manufacturer’s support page.
- Buying a new monitor too quickly: Test your cable, laptop, and monitor with other devices first.
- Changing several settings at once: Make one change, test the display, and then continue if the problem remains.
Frequently Asked Questions
Why does my laptop say no signal when connected to a monitor?
This usually means the monitor is not receiving a usable video signal. Check the cable, monitor input source, laptop video port, and adapter compatibility. Also try detecting the monitor through Windows Display settings.
How do I connect my laptop to an external monitor using HDMI?
Connect one end of the HDMI cable to your laptop and the other end to the monitor. Turn on the monitor, select the correct HDMI input, and press Windows + P to choose Duplicate or Extend.
Why is my HDMI monitor not detected by Windows 11?
Possible causes include a loose or damaged HDMI cable, an incorrect monitor input, an outdated graphics driver, or a problem with the laptop’s HDMI port. Try another cable and use the Detect option under Display settings.
Can I connect two external monitors to my laptop?
Yes, if your laptop and its graphics hardware support multiple external displays. The number of supported screens depends on the laptop model, video ports, docking station, and display connection technology.
Why does my external monitor work but show a black screen?
Check the selected display mode, screen resolution, refresh rate, and monitor input source. If the monitor is detected by Windows but remains black, try switching between Duplicate and Extend using Windows + P.
Does every USB-C port support an external monitor?
No. Some USB-C ports support charging and data transfer only. Your laptop must support a suitable video output standard, such as DisplayPort Alt Mode or Thunderbolt, for compatible external display connections.
Conclusion
A laptop that refuses to connect to an external monitor can be frustrating, but you do not need to assume that the hardware is damaged.
Start by checking the power supply, cable, and monitor input. Then use Windows display settings to detect the screen and select the correct display mode. If the problem continues, investigate graphics drivers, USB-C compatibility, docking stations, and supported screen resolutions.
The most effective approach is to test one component at a time. Try another cable, another port, or another display before spending money on replacement hardware.
With a little troubleshooting, you can often get your external monitor working again without visiting a repair shop.