How to Save WebP Image Format in Photoshop
WebP is a relatively new image format developed by Google, primarily used for web content due to its small file size and high image quality. If you are using an old version of Adobe Photoshop, you might not get this image format. The new WebP image format is available in the newer version of Adobe Photoshop (2023 or later). So follow the steps below to learn how to save WebP image format in Photoshop.
How to Save WebP Image in Photoshop?
Follow these steps to save a WebP image in Photoshop:
Step 1: Open or create your image in Photoshop.

Step 2: After doing the necessary edits, go to “File” and then click on the “Save a Copy” option. A new window will show up with different save settings. If you like shortcuts in Photoshop, then Press Alt+Ctrl+S to save your image in WebP format.

Step 3: In this windows add your file name, and then from the “Save as type” option choose WebP format. You can find this option at the end of the list.
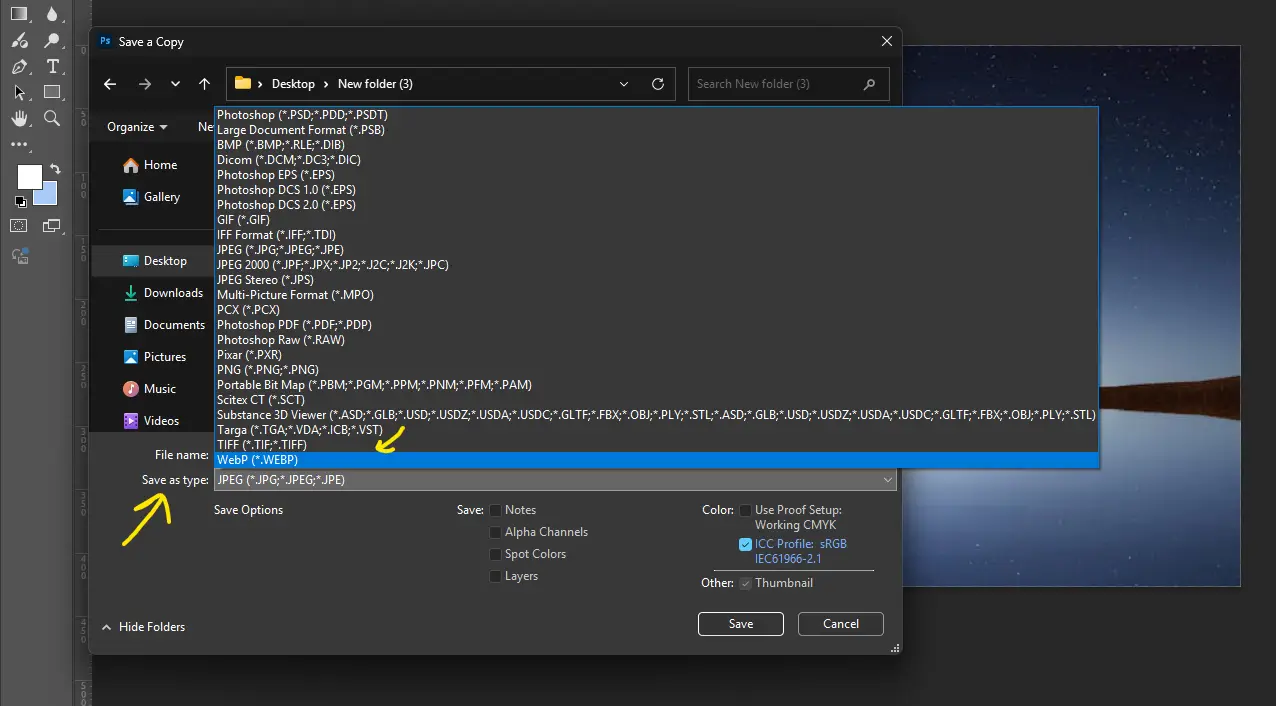
Step 04: choose the location where you want to save this image, and it’s done.
By following these steps, you can easily save your image in the WebP image format in Photoshop. I hope this tutorial will help you.
Also Read: